Set up VS Code
Open VS Code as your file viewer and terminal host — the foundation for every project you build.
Create your projects folder
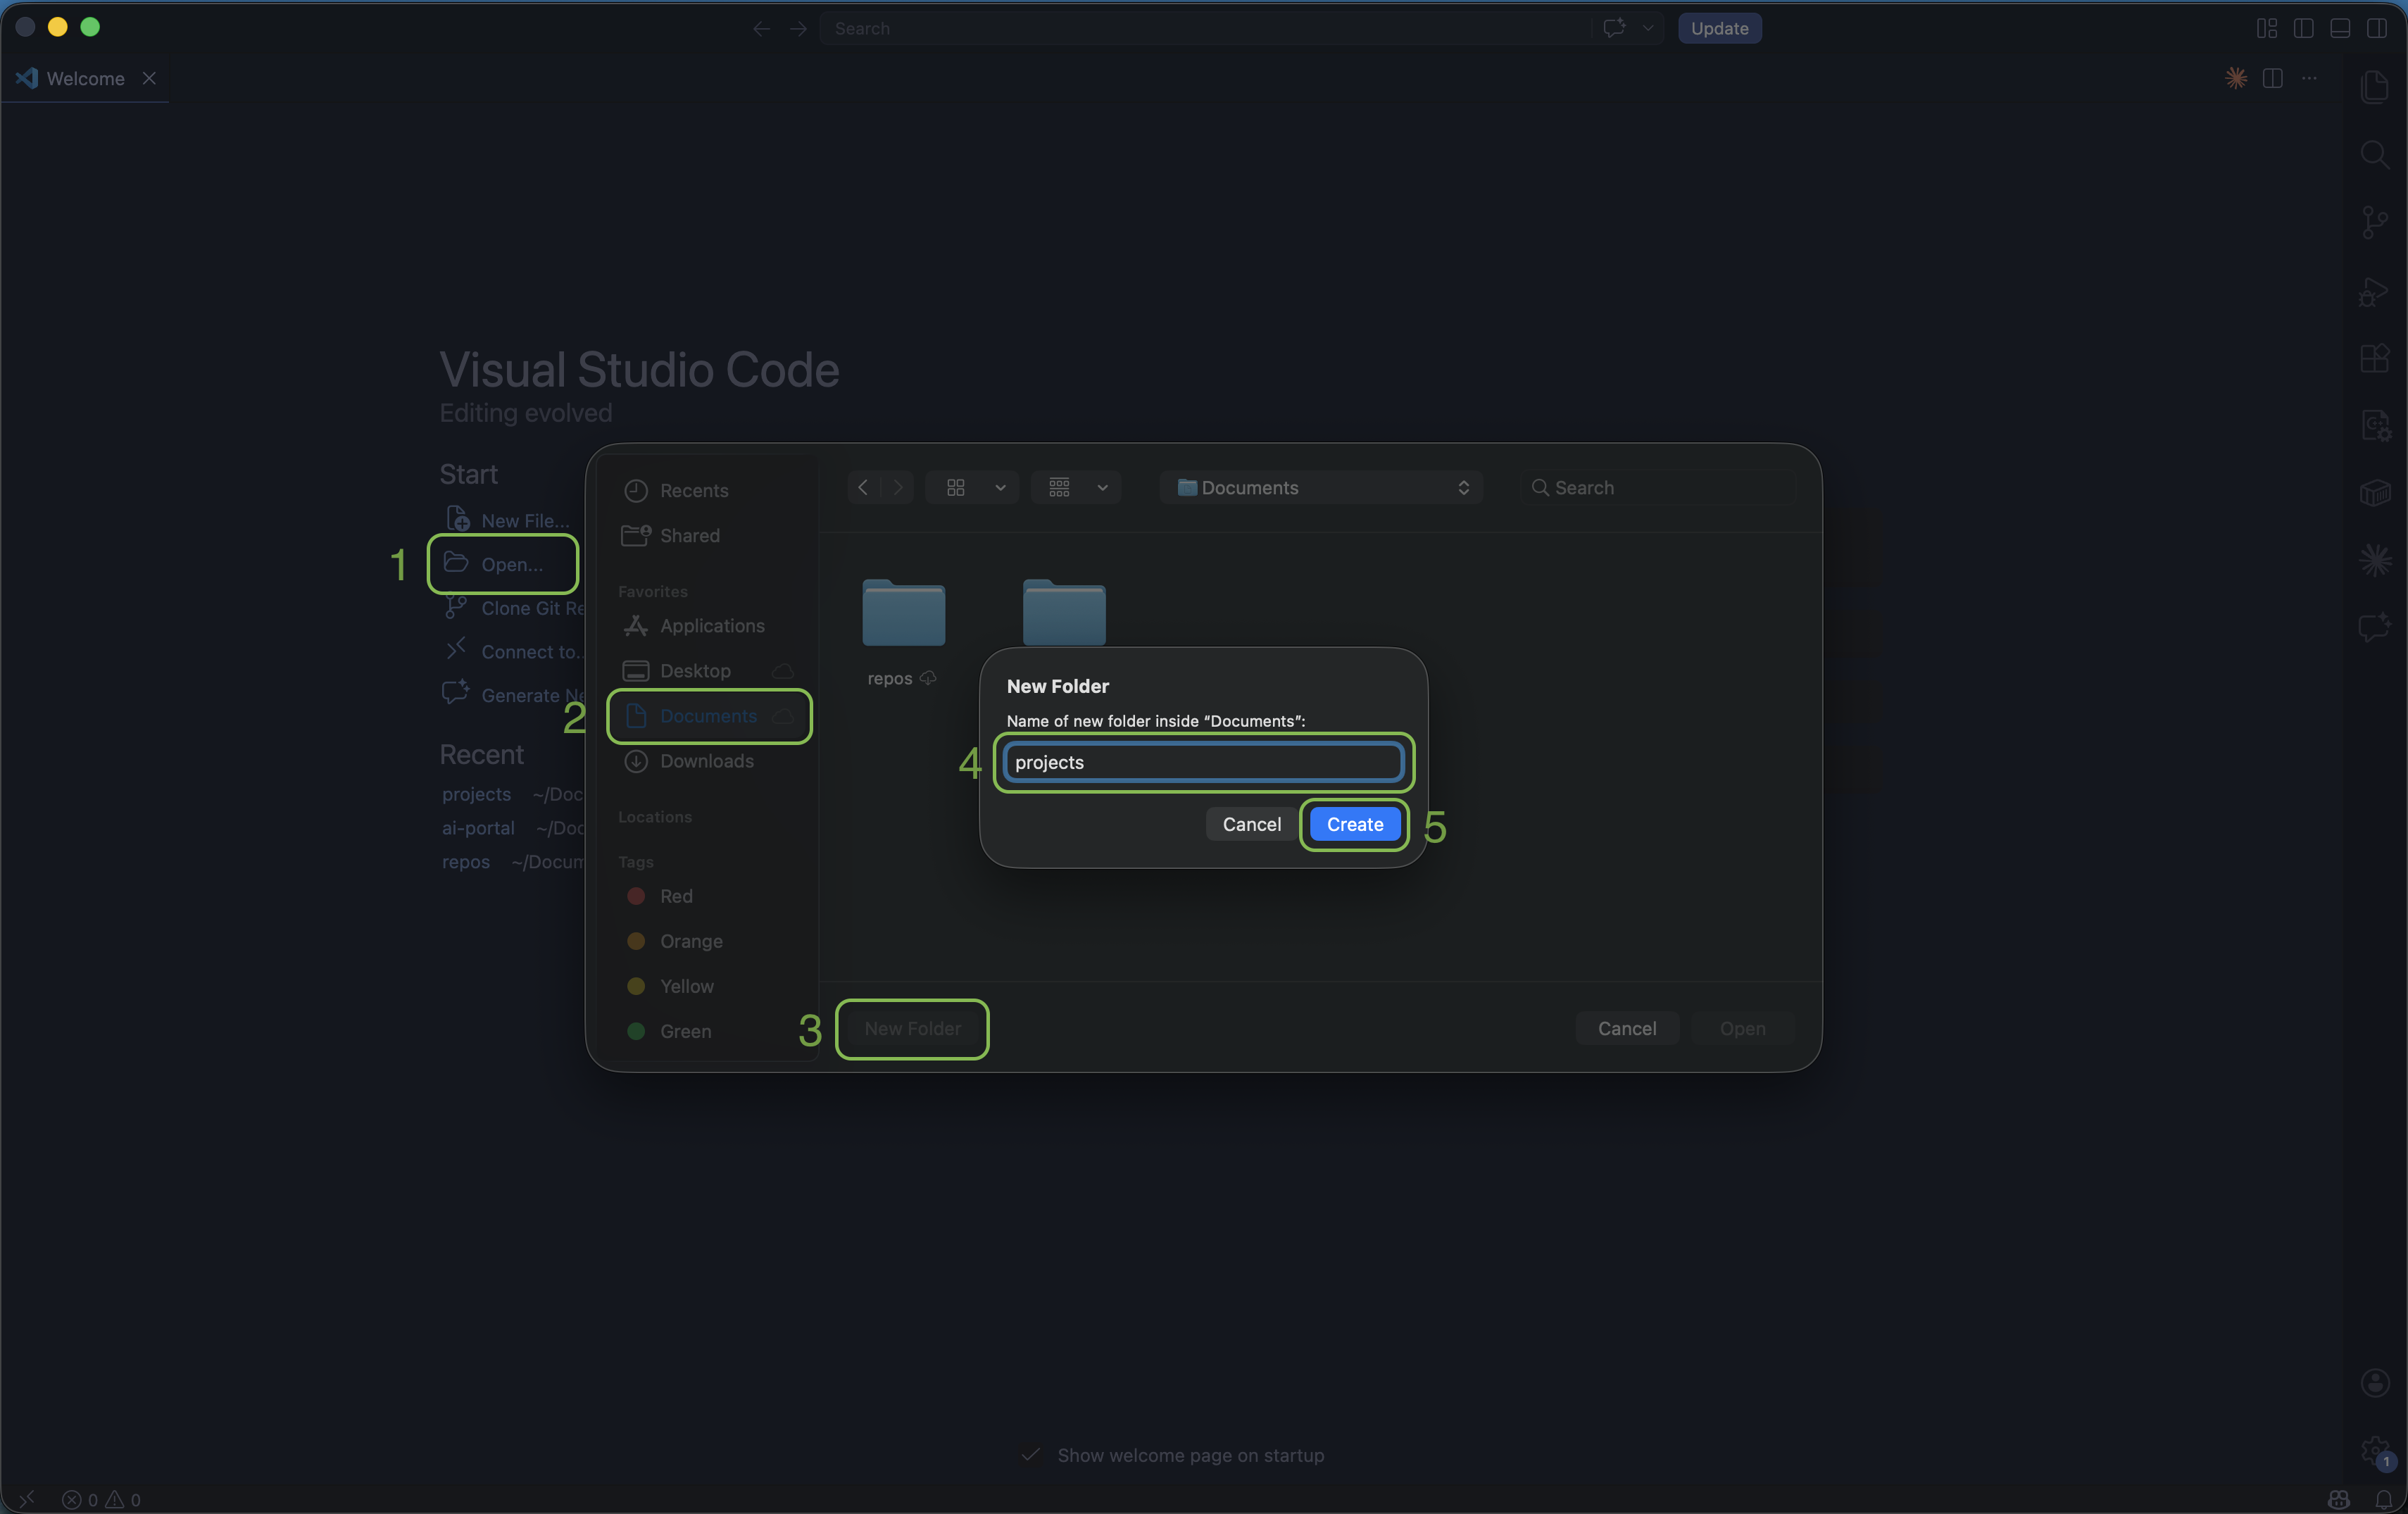
Open VS Code — download it here if you don't have it. Then click Open… → navigate to Documents → click New Folder → name it projects → click Create.
Open the integrated terminal
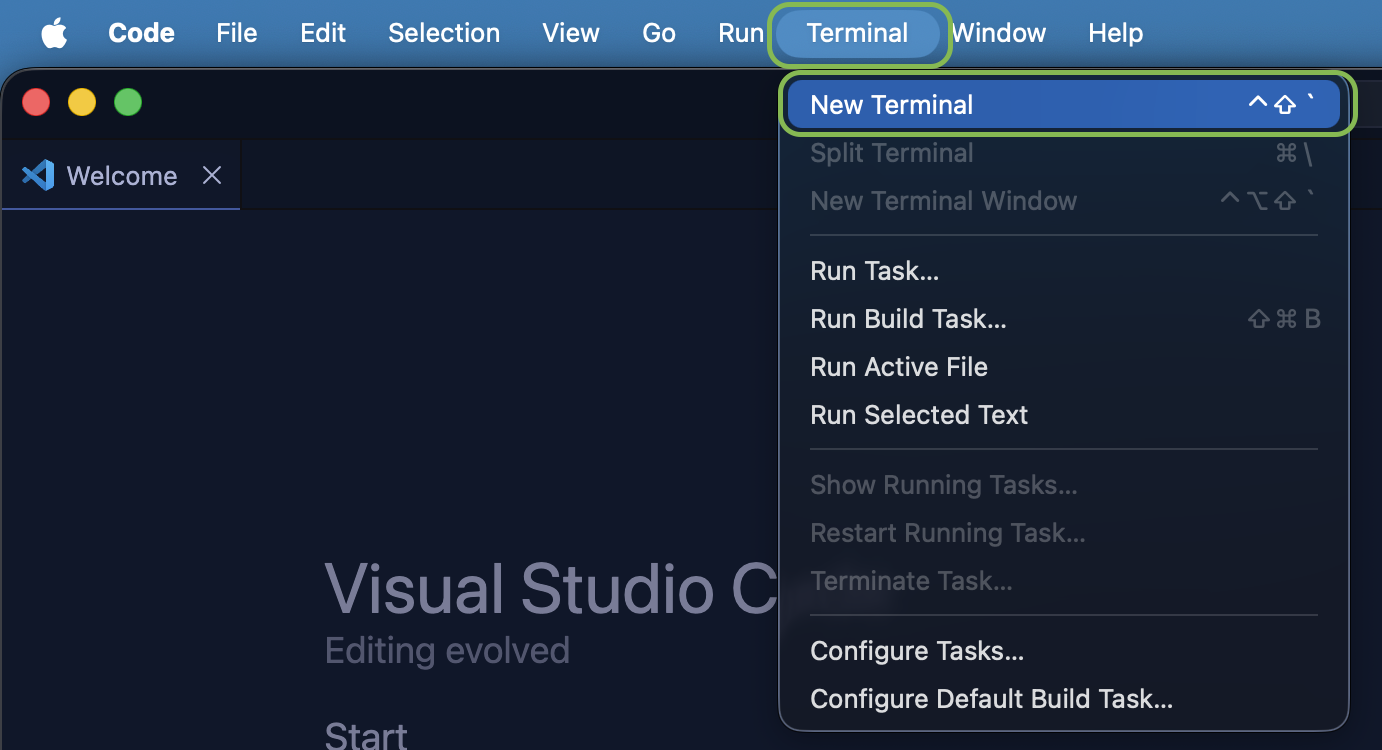
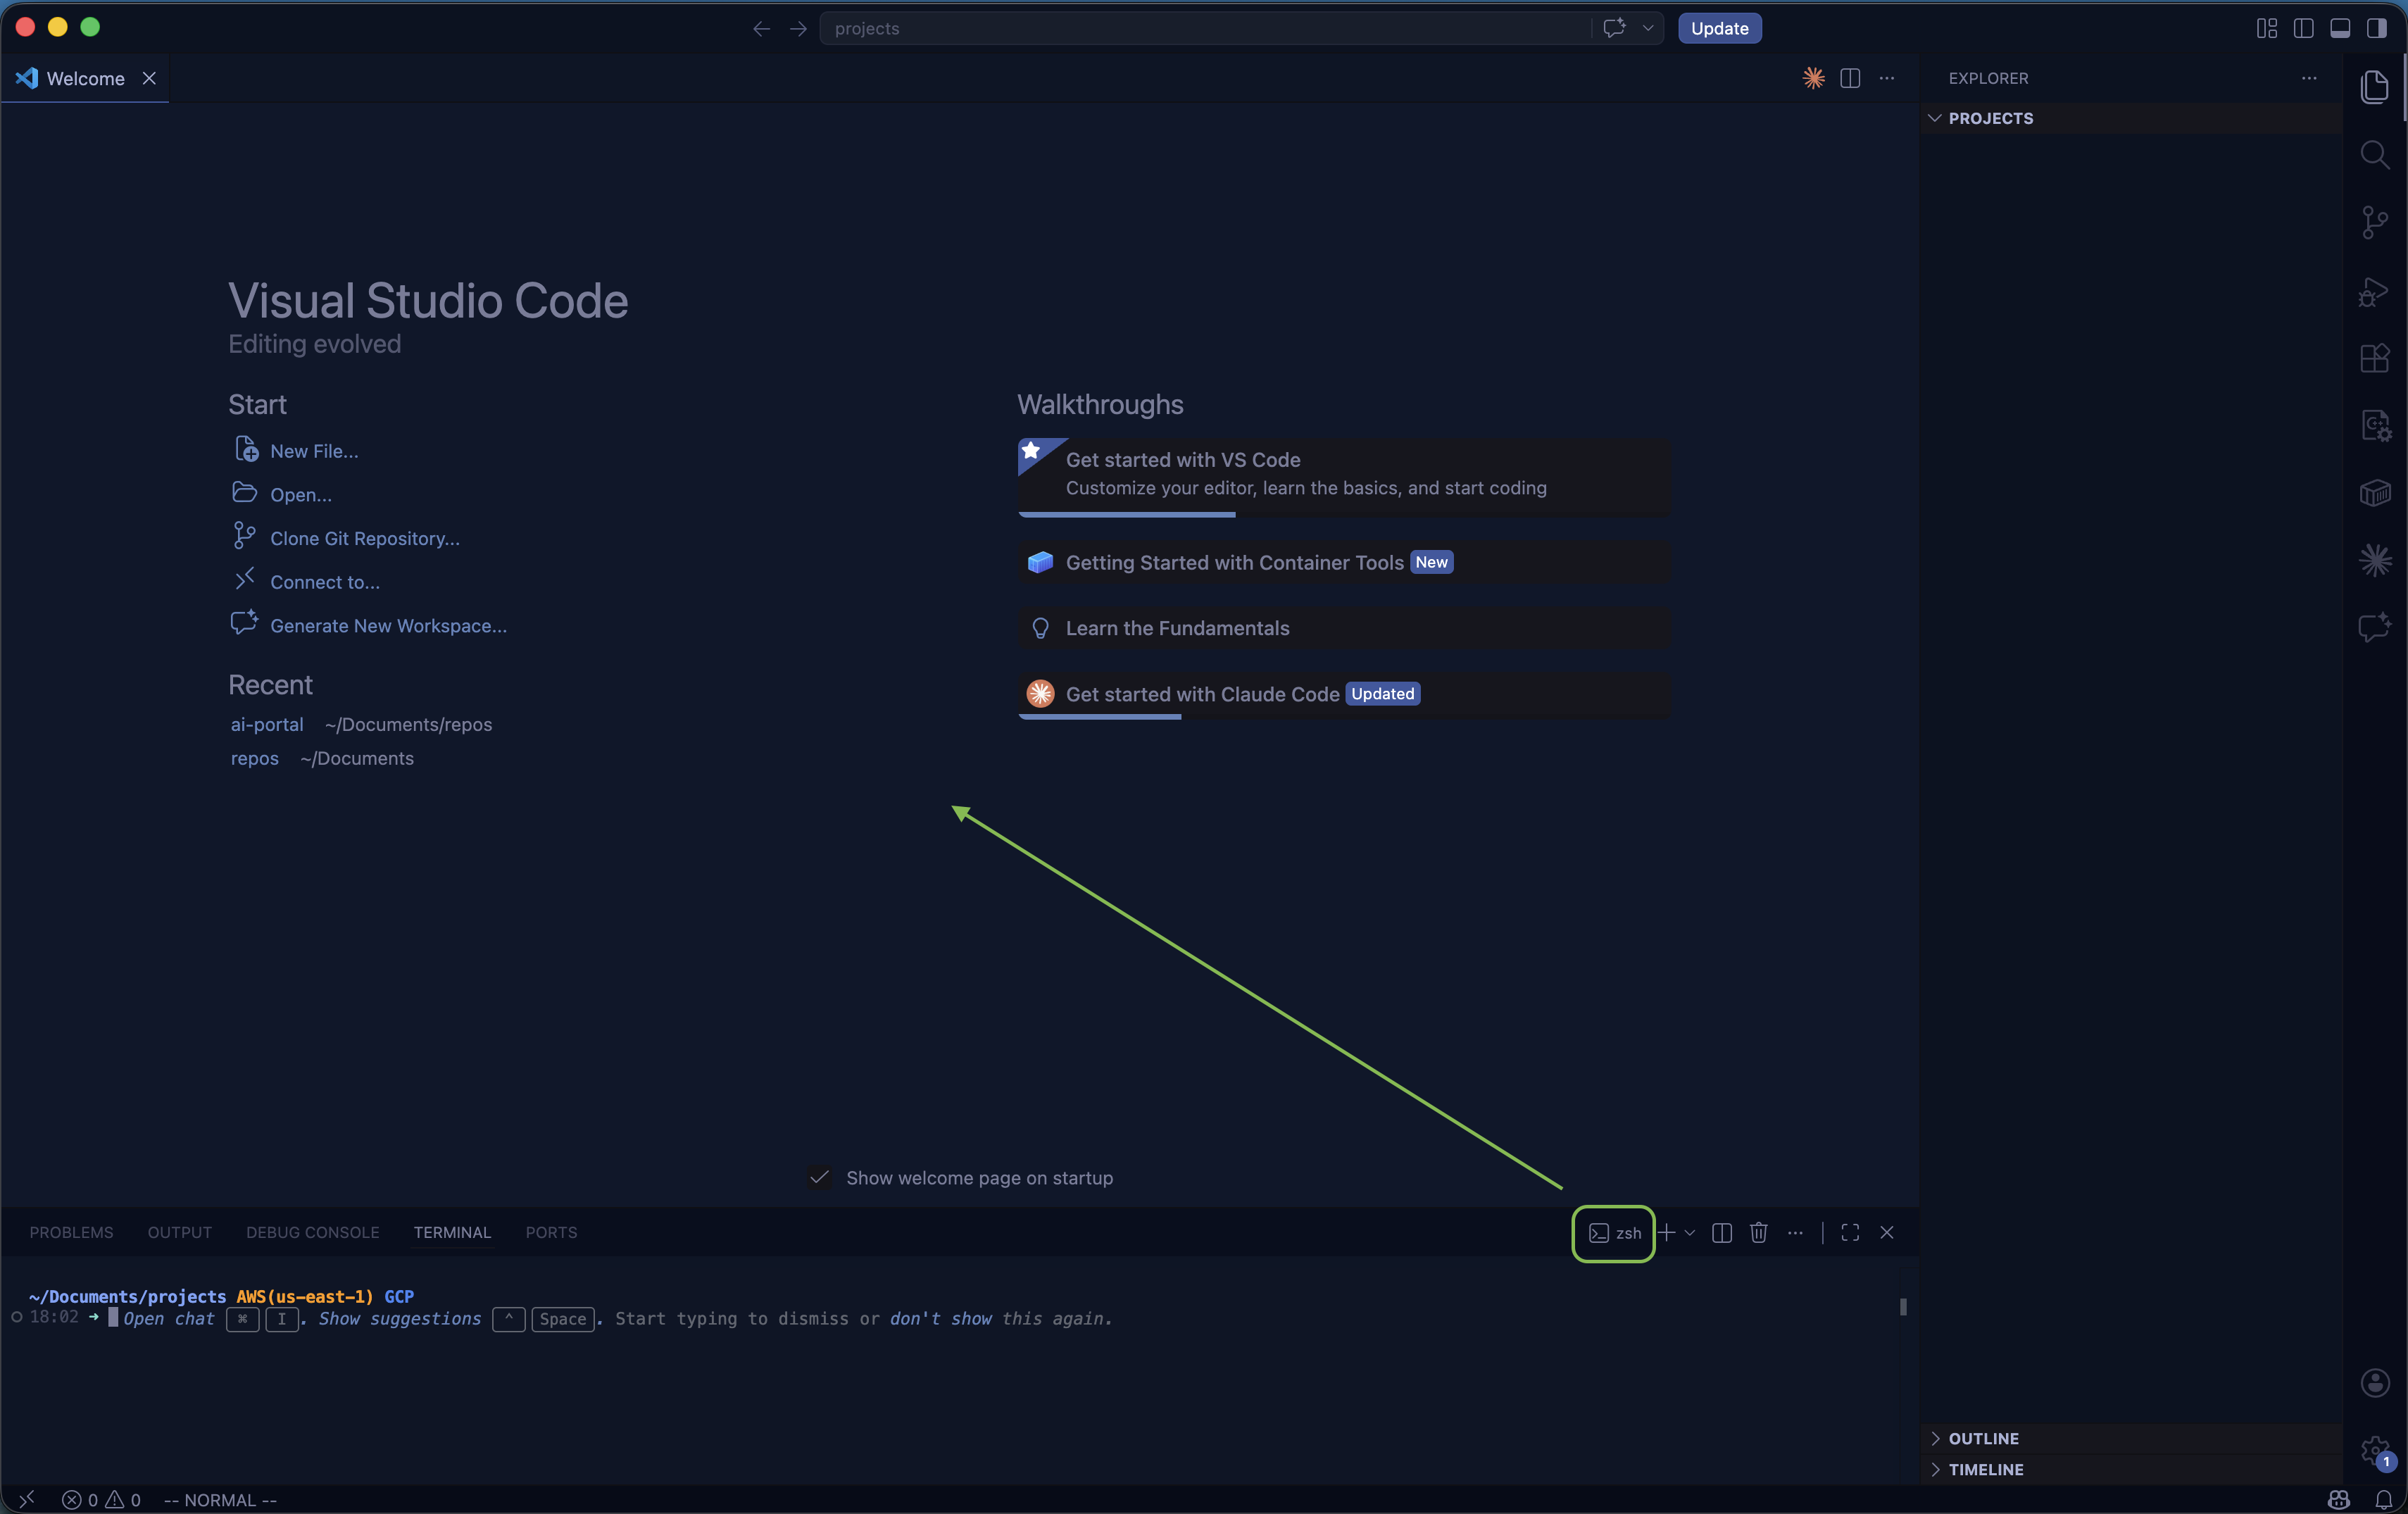
Go to Terminal → New Terminal in the menu bar. A terminal panel opens at the bottom — already inside your projects folder.
Confirm your location
Run this to verify you're in the right place:
pwd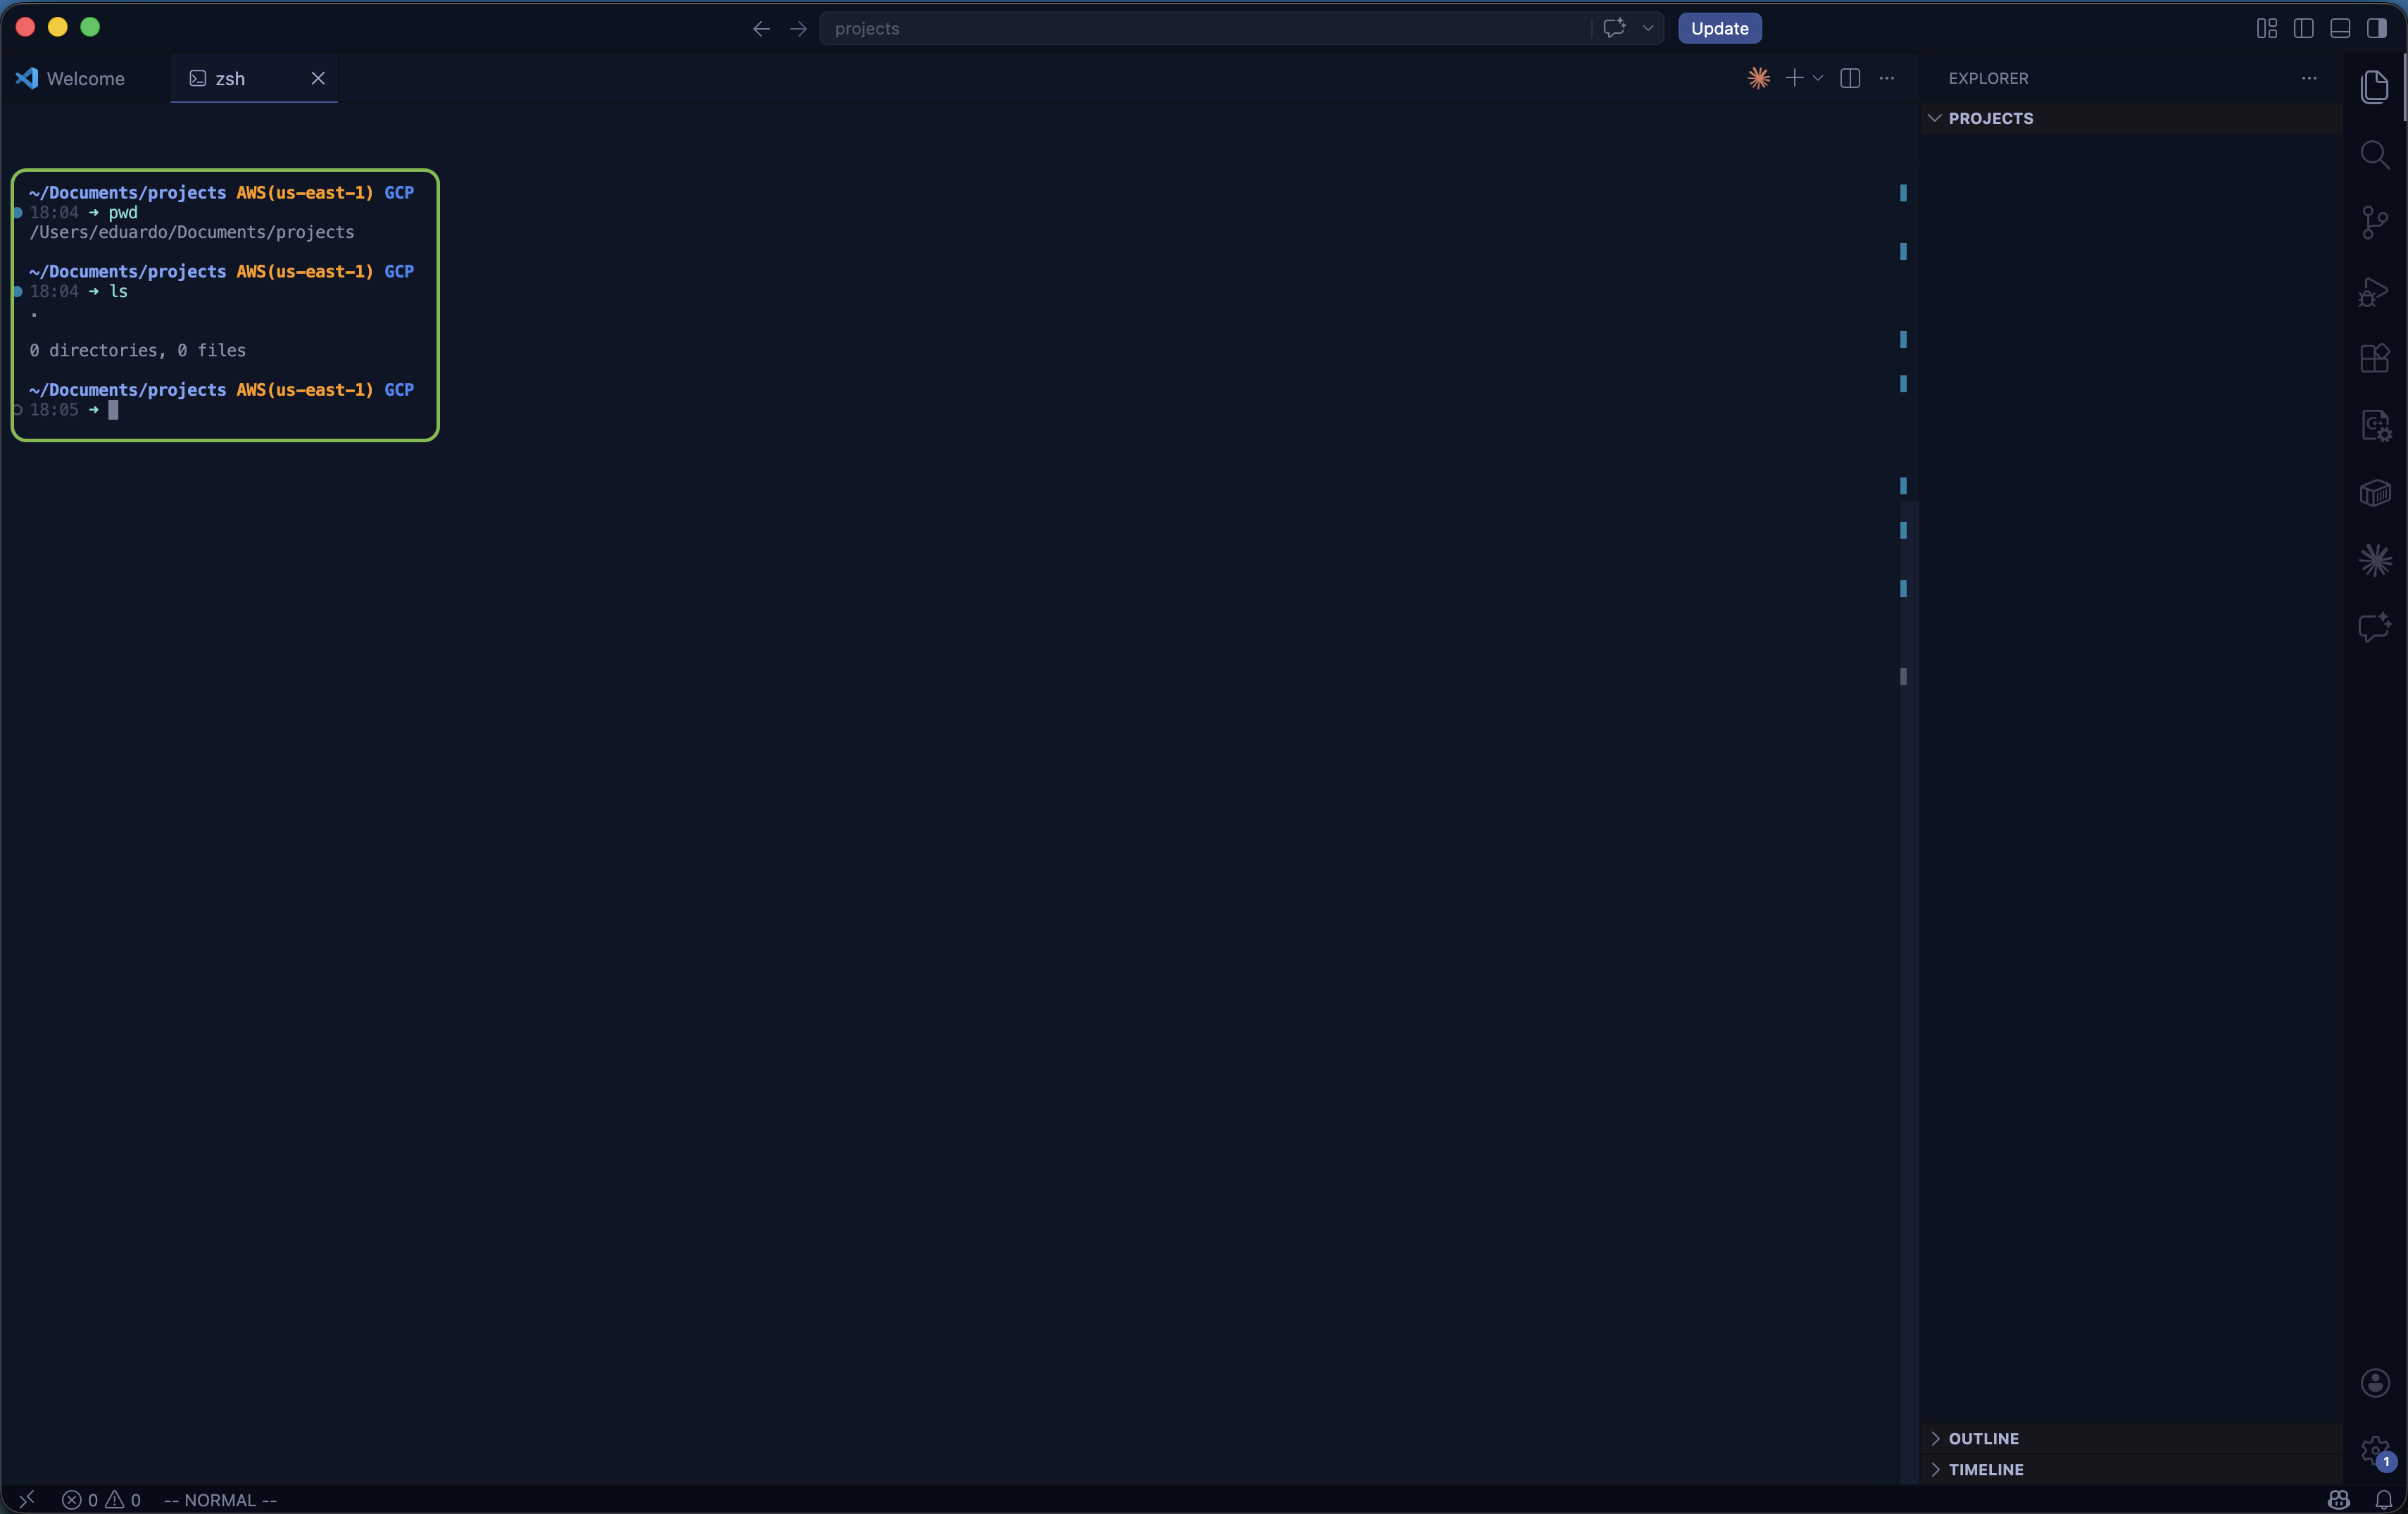
You're set. Every project you build from now on lives inside this folder — and Claude always starts from wherever your terminal is.
Configure your settings
Press Ctrl+Shift+P (or ⌘+Shift+P on Mac), type Open User Settings (JSON), and hit Enter. Replace the contents with this:
{
    "editor.minimap.enabled": false,
    "editor.wordWrap": "off",
    "editor.autoClosingBrackets": "never",
    "editor.autoClosingQuotes": "never",
    "editor.formatOnSave": false,
    "editor.formatOnPaste": true,
    "editor.smoothScrolling": true,
    "workbench.editor.revealIfOpen": true,
    "workbench.sideBar.location": "right"
}These settings disable distracting auto-completions, remove the minimap, and move the sidebar right — so opening it doesn't shift your code.